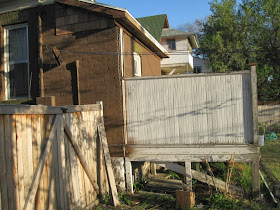
However, the structural defects of the porch roof became apparent immediately. One half of the roof had collapsed and had created a bowl. Knowing that this was a serious project, the roof was patched and the can was kicked until last April.
The first order of business was to remove the long 3x6 shingle panels that had been put on the roof. Here you can see the tar line on the brick where the roof originally hipped into the exterior wall of the home. The arched bricks behind my toolbox are over a former transom window that had been bricked in.
I began peeling back the layers to reveal the skeletal frame. I marveled at the craftsmanship (not necessarily the engineering) used in building the porch. The porch was constructed of rough hune virgin lumber and was built sometime in the 1910's. The home itself was the home of Weber County's first County Commissioner after statehood, F.L. Vorhees, and was constructed in 1898.
Here you can see where the roof truss timbers broke over an interior portion of the home.
Here you can see where half of the of trusses had vertical supporting posts. The other half were just toe-nailed into the decorative trim on the back wall of the home. It is no wonder that the trusses collapsed under a heavy snow load years ago.
Once the trusses were removed, we see the old transom window clearly and a very interesting design on the bump out of the home. It appears that the bricks were cut to create a lean-to roof structure. However, there is no evidence of framing. I imagine the original construction had cedar latch spanning the brick and cedar shake on top. It would have been simple but effective for a pantry or root cellar type room.
I removed the tongue and groove soffit next.
Then the ceiling joists were removed.
The screen frames were removed and we recycled the roof trusses to create new ones for the new lean-to roof over the pantry room.
Finally we cut down the supporting roof posts to make a nice decorative rail around the new open deck space. Then we took a year off to recover from the work. Recently, I hired my crack handyman to finish the job. I needed him to build new stairs and paint the rail and deck.
We are very happy with the outcome. We used A100 Sherwin-Williams exterior grade paint with colors matched from the Eddie Bauer collection at Lowes. Palm (green), Craft White, and Canoe (brown) were the colors selected.
The decking was tongue and groove planks and to keep it from decaying in the elements, we covered it with Restore brand deck paint with a Russet color. It is very thick and protects the wood from further decay. It also provides a nice walking surface with traction.
It is nice to have one less project to work on. Now on to the next...


No comments:
Post a Comment
Please keep comments appropriate and respectful for a real estate blog. Personal rants, spam, and off topic comments will be deleted.